Breeding and genotyping
Wean a litter into cages
Check the surviving pups, choose their cages and identifiers, and create their individual records.
Before you start
- Have the litter's current male and female counts, total deaths before weaning and the intended cage assignments. Check each pup's sex rather than relying on estimated starting counts.
Step 1: Open the litter and check the counts
Open the litter from Litters or the Due list and choose Wean into cages. Check the displayed age and Wean date. Enter the surviving Males and Females. Found dead is the total at birth and since, before weaning.
An unknown dead-at-birth count does not block weaning. You can add that birth count later through Edit litter to enable the loss comparison.
Step 2: Assign the cages
Review the proposed cages for each sex. Choose an existing Cage or New cage, and check Cage number and Holds for new housing. Split a group when it needs more than one cage, then check which pups each cage will hold.
Step 3: Check the pup identifiers
Review each proposed animal ID and ear tag before saving. When your lab uses ear tags as animal IDs, enter the intended tag values so the new records match the animals at the rack.
Step 4: Confirm and inspect the weaning
Use the weaning button after checking the counts and cages. Read Check before weaning if an early age, housing or protocol warning appears; choose Go back to correct it or confirm the recorded work.
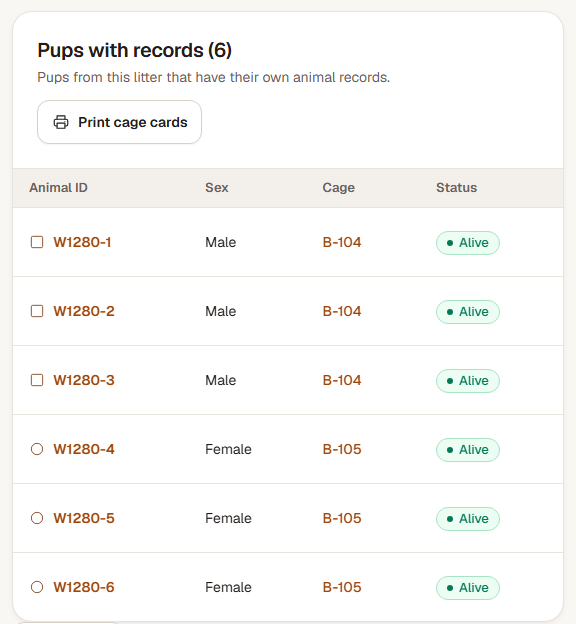
The litter then shows Pups with records. Open the new cages and use Print cage cards to label them.
Check the result
Each weaned pup has an individual record in its assigned cage, linked to the litter and parents. The litter records the wean date and surviving count.
Undo a weaning entered in error
Open the litter and choose Undo weaning within 24 hours, before further work is recorded on its pups or new cages. Review the records that will be removed, then confirm. If later work prevents Undo, use the explanation shown to identify the records needing correction.