Records and housing
Print cage cards
Choose the cages and card stock, check the current residents, and print cards with links to their records.
Before you start
- Have the card or label stock you will use. Check that the cage's residents and recent cage change are recorded before printing.
Step 1: Choose the cages to print
In Housing, tick the cages you need, then use the Print button showing how many are ticked. With no cages ticked, choose Print cards to print the displayed list.
You can also open a single cage's card, or print the new cards from a completed weaning.
Step 2: Match the stock and check the card
On the print page, choose Card or label stock to match the paper or labels. If Save as lab default is available, use it to retain that choice for your lab. Use Changed today to limit this set to cages changed on the current facility day.
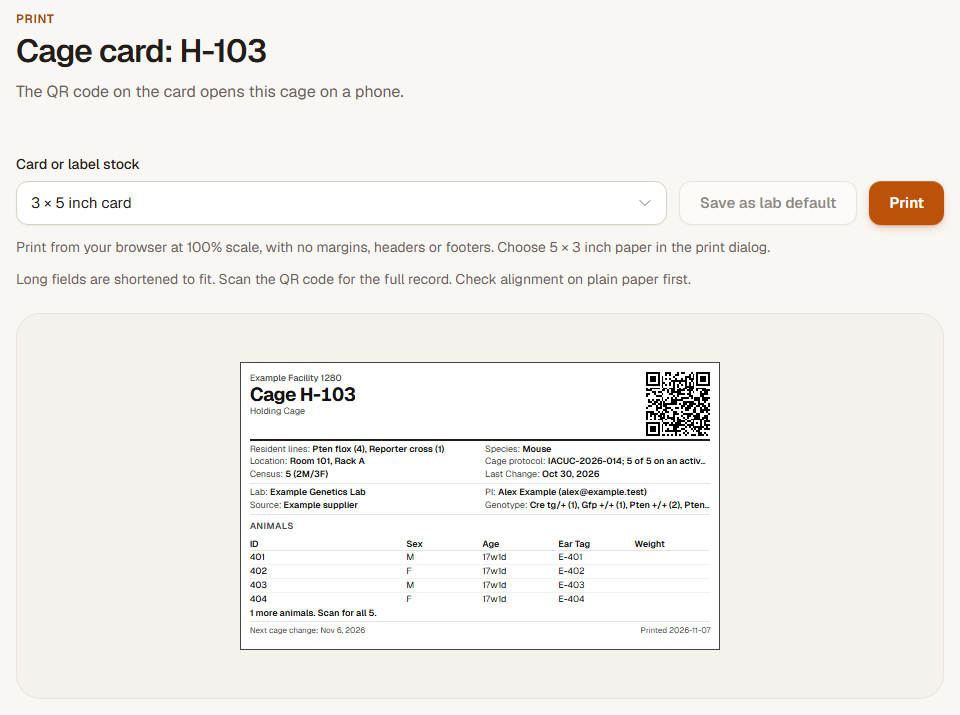
Check the cage number, residents, line and protocol information, dates and QR code. Long fields can be shortened on the printed card; the QR link opens the complete cage record.
Step 3: Print at the intended size
Choose Print and use the paper size named beside the selected stock. Set the browser print scale to 100%, with no margins, headers or footers. Check one sheet on plain paper against the stock before printing the full set.
Check the result
The printed cards identify the selected cages and their current residents, with QR links back to the full records.
If the card does not match the cage
Return to the cage record and correct the residents, protocol or cage-change date first, then reopen the card. If the content is right but the print does not align, check the selected stock, paper size and 100% scale before printing again.