Records and housing
Add mice to your colony
Record a shipment or another intake, with individual IDs, housing and protocol details.
Before you start
- Have the animals' sex, birth date if known, line, source and any arrival or quarantine dates. Decide which cage and protocol they belong to.
- A batch shares its main details. Enter separate batches for animals with different sex, birth date, line or housing.
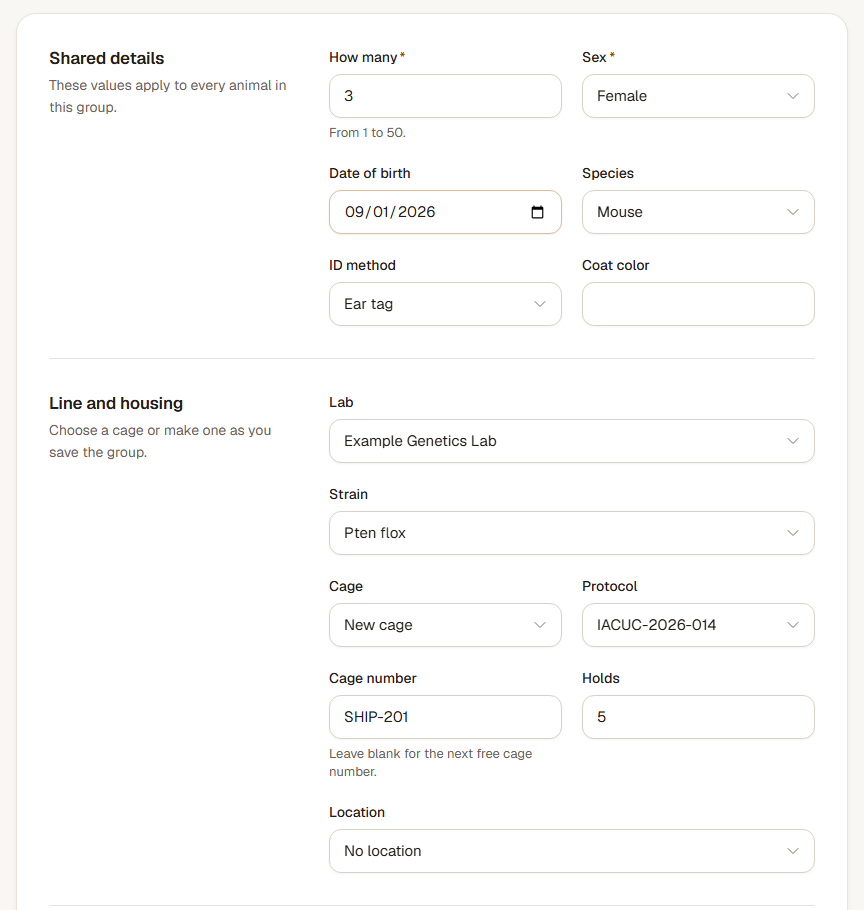
Step 1: Choose the batch details
Open Animals, then choose Add animal. Set How many and choose Sex deliberately. Select the species, line and, in a facility, the lab. Enter the dates and source you have recorded.
If the line is new, open the header's Add menu and choose Add line first. You can add its genes and mark Floxed and Transgenic independently, then return to the intake.
Step 2: Set the cage and protocol
Choose an existing Cage or select New cage. For a new cage, check Cage number, Holds and Location. Choose the Protocol for this group. A new cage's details stay in the form if you change labs.
Step 3: Check each animal's identifier
Review each Animal ID and Ear tag. Suggested IDs can be changed before saving. If your lab uses ear tags as animal IDs, the same value appears in both fields. Add individual microchip IDs or weights when needed.
Step 4: Save and inspect the records
Save the group, or choose Save and add another to continue entering animals. Read any capacity or protocol warning before confirming. Open a saved animal and its cage to check the IDs, sex, line and housing.
Check the result
Each animal has its own record in the chosen cage, with the shared intake details and its individual identifiers.
If a warning needs a change
Choose Go back, correct the cage, count or protocol, and save again. If an ID is already used, enter a different ID in the highlighted field. The form keeps the rest of the batch.